
Astrophotography
Shooting Stars …advice from our local astro-photographer – Brian Wilson:
Photographing and capturing the night sky is both recreational and educational. The night sky has fascinated human kind for millennia. Cultures, including the Irish, worshiped celestial objects like the Sun and Moon long before the introduction of modern religion.
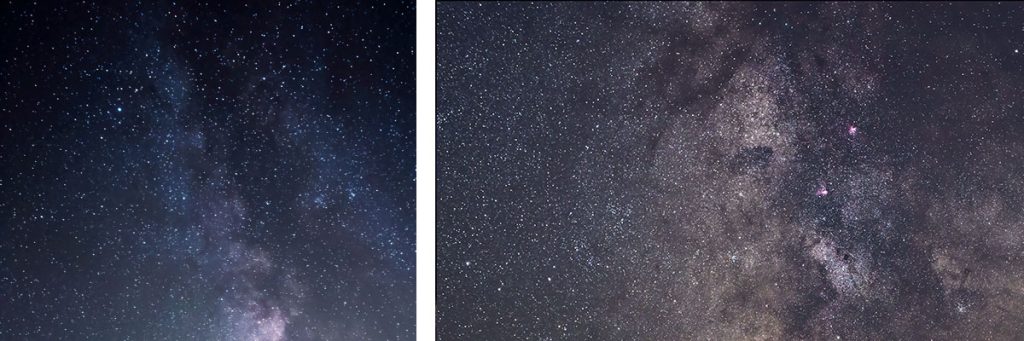
Starlight however has been diluted by ever increasing urban areas and light pollution from streetlights over the past hundred years. It is estimated that one third of the world’s population has never seen the Milky Way because of light pollution. It is important to be aware of light pollution and the effects it can have on our environment.
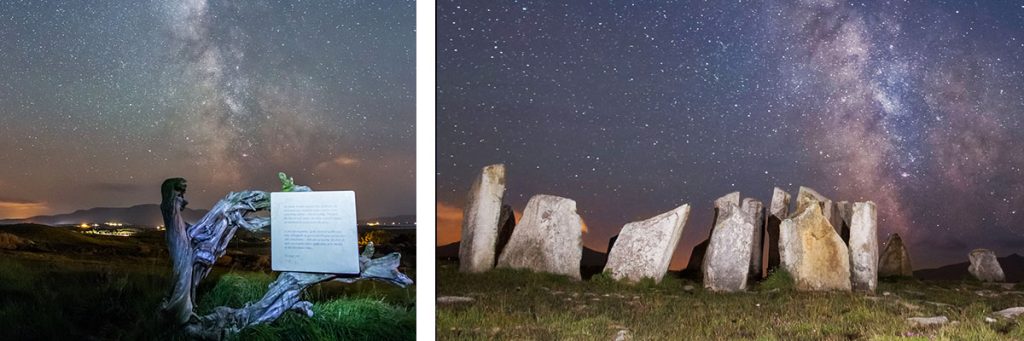
Wide field astro-photography can give an interpretation of the night sky showing how it interacts with the landscapes, seascapes, buildings, sculptures and people, something our ancestors would have been all too aware of, revealing all the amazing night sky wonders visible, especially from County Mayo. The people of the west of Ireland can still experience with relative ease, the beauty and wonder of a star filled sky, giving them a link to their past, and to their heritage.
Ten Steps to Photograph the Night Sky
- A sturdy tripod is essential due to the long exposure times.
- A camera body with high ISO capabilities and manual exposure, preferably a DLSR. Setting your camera to manual mode to take an exposure of approx 20-30 seconds (maybe less, maybe more depending on what focal length lens you are using and what you want to achieve.) Also a remote release or use of the self timer of 2 seconds, why? to reduce possible camera shake.
- A fast wide angle lens set to manual. Nikon 14-24mm, F2.8, the Canon 16-35mm F2.8. Samyang 14mm F 2.8, Samyang 24mm F1.4, Sigma 35mm 1.4. That said, your normal kit lens 18-55mm f3.5 will work fine too as will many other prime lenses.
- Focusing at night can be a challenge, one preferred method is to use live view, zoom in on a bright star (with the zoom buttons, not the lens) and manually focus until it’s a sharp point of light. If you’re using a prime lens you can simply set your hyper-focal distance with the markings on the lens. Some lenses have their own unique characteristics so play with it a little to find infinity.
- High ISO’s are the key to capturing a bright Starry sky, don’t be afraid to push the limits of your camera, this is the only way to capture enough light to create a great image. Start with ISO 3200 and go up or down from there to get the correct exposure.
- Long shutter speeds allow you to collect light over time, the longer you go, the brighter the Milky Way and stars will be. There is a caveat to this though; the earth is rotating. If you leave the shutter open for too long you will create star trails, which is not desirable for the Milky Way. To avoid this you can follow the 450 rule. Some say the 600 or 500 rule but I find the 450 rule to be most pleasing. What is the rule? Divide the focal length of the lens into 450 to get the correct exposure time to avoid star trails or movement of the Stars. (35mm format)
e.g. 1. You have a 50mm lens on a 35mm sensor camera (Full frame camera), what max exposure time to use for avoiding star trails? 450/50=9. So 9seconds would be the max exposure time before Star trails would begin to become noticeable
e.g. 2. You have a 50mm lens on a cropped sensor camera, you need to firstly convert to equivalent full frame focal length. So 50mm x 1.5 for most cropped sensor cameras or 1.6 for canon cropped sensors camera. So 50mm x 1.5= 75mm equivalent on a full frame, then 450/75=6. So a 6 second exposure will be your max exposure time. - Set your aperture wide open, meaning the smallest number possible (f2.8, f1.4, etc.), but this will depend on the lens you’re using. We have to capture as much light as possible, so depth of field is less of a concern than it would normally be. You may have to stop down some lenses to correct for coma or softness, for example you may need to stop down an f/1.4 lens to f/2, and this varies by lens.
- Finding a dark sky is the most important step to seeing the Milky Way. Light pollution from Cities and Towns tends to washes out the night sky; you may have to drive a long distance depending on where you’re located.
- Careful attention must be paid to the phase of the moon; a full moon will wash out the Milky Way. The best time to go out is 4 days before or after a new moon. Or why not use the Moon to light a foreground? Again going either 4 days before or after a full moon, the Moon would work very well to light a landscape or foreground.
- Many people are surprised to find out the Milky Way is not visible the entire year, at least not the brightest portion that is easily visible to the eye. The best viewing times are May thru December in the northern hemisphere.
Important
Always dress accordingly, hats, gloves, warm clothing, high visibility vest, boots, wellies. Bring some snacks and a flask of something warm if you plan on being out for an extended period. Make sure to charge all batteries including phone etc. Scope out possible locations during the day, check phone coverage and make sure to have enough fuel in your vehicle.
Always let someone know where you are going or intend to go, especially if going alone.